This tutorial describes the configuration of OpenVPN on Ubuntu 20.04 LTS using the built-in Network Manager.
STEP 1) First, click the network icon on your menu bar and click Settings.

STEP 2) On the VPN section tap +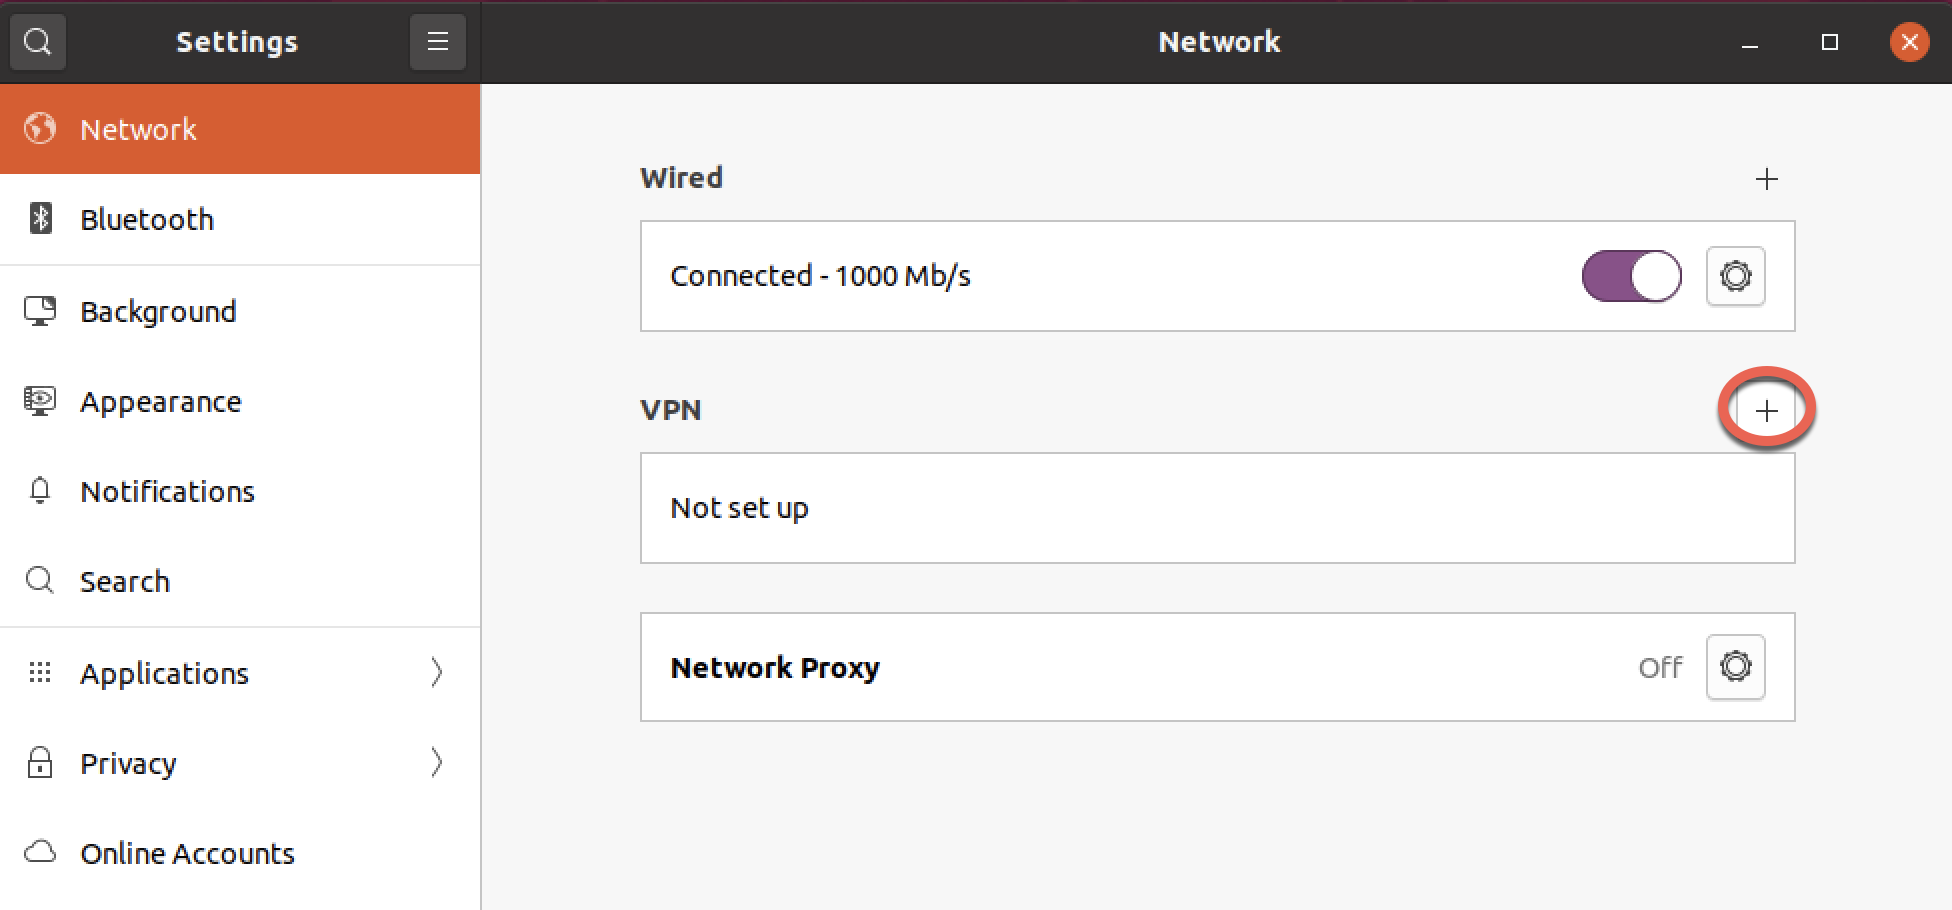
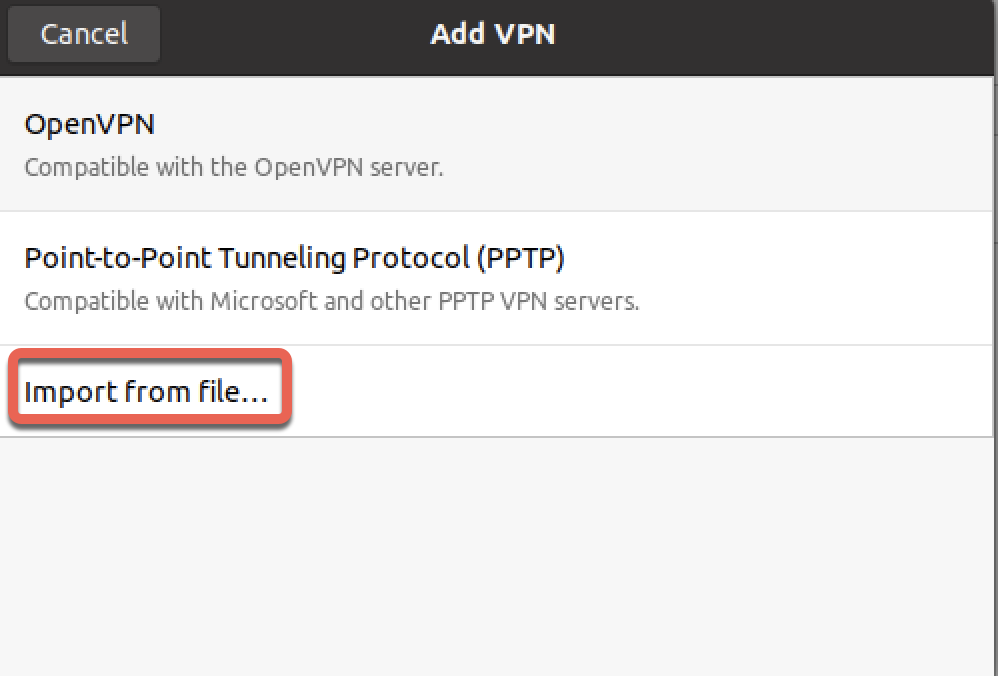
STEP 3) Now tap Import from file... (Please generate your config using our Config Generator, simply leave the config as default, click your location, choose your port/encryption and hit generate to download your config)
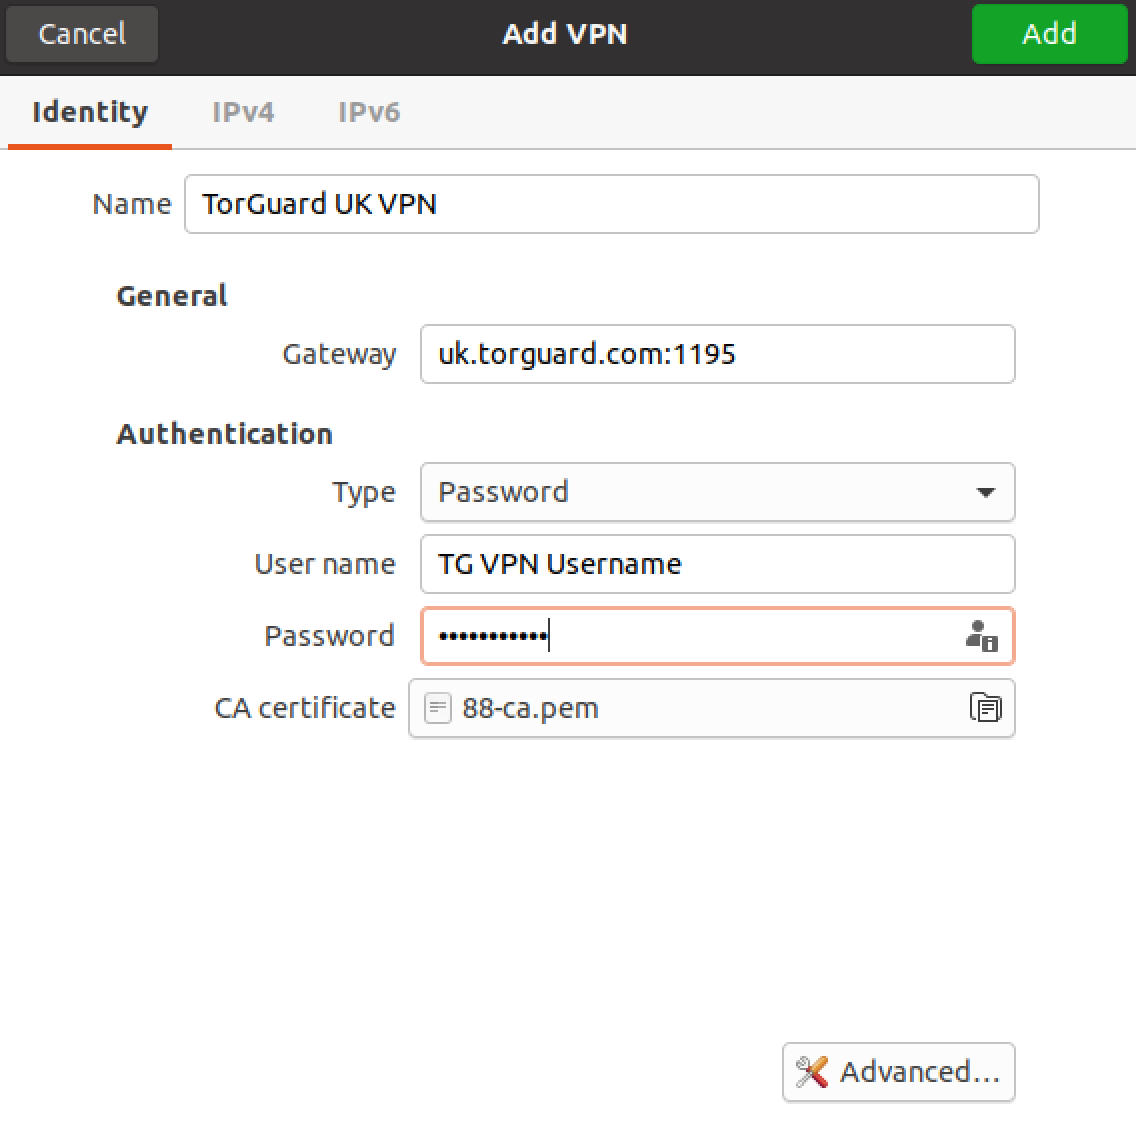
STEP 4) The config should now be imported - now set the Name to a name for the connection and enter your TorGuard VPN Username and Password, lastly, click Add on the top right-hand corner to add your connection.
STEP 5) Once you have added the connection simply slide the button for your profile to the right to connect the VPN.
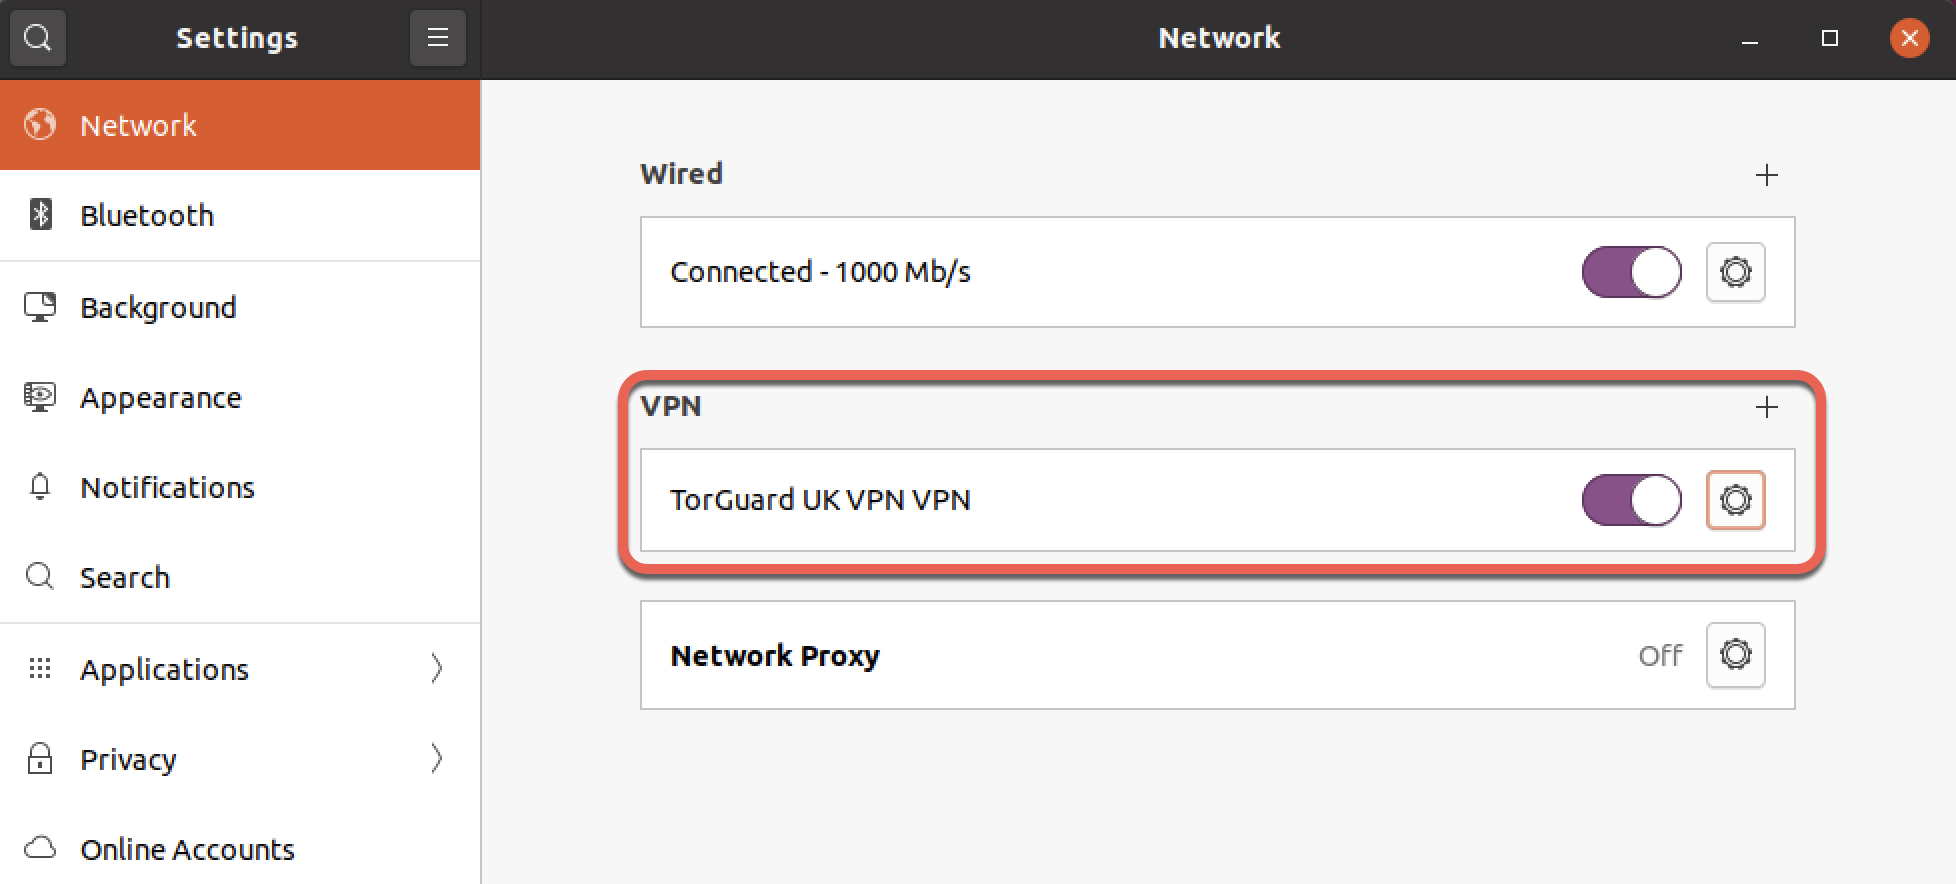
STEP 6) You should now be connected - you will see the VPN icon appear in the menu bar if successfully connected.

If you still have problems setting this up please please don't hesitate to contact us on our support desk.