
Each config works on one device, and you can hold up to three at a time per VPN username.
STEP 1:
Install AmneziaWG from Google Play.
STEP 2:
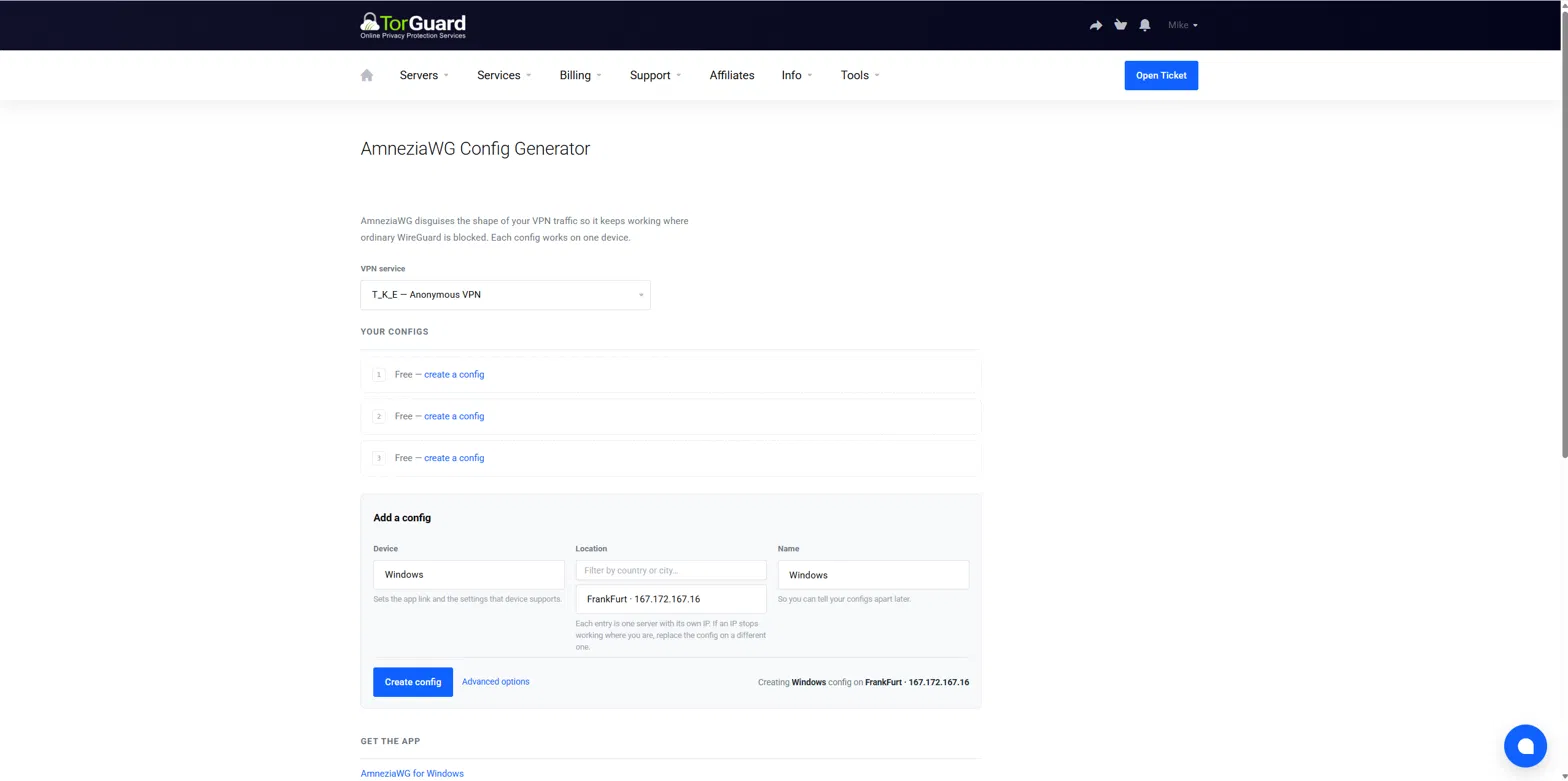
Sign in to the TorGuard client area and open the AmneziaWG config generator under Tools.
a) If you have more than one VPN service, choose the one you want under VPN service.
b) Set Device to Android. This matters — it selects the settings your app understands.
c) Choose a Location. Each entry is a separate server with its own IP; type in the filter box to narrow the list.
d) Give it a Name so you can recognise it later, then click Create config.
STEP 3:
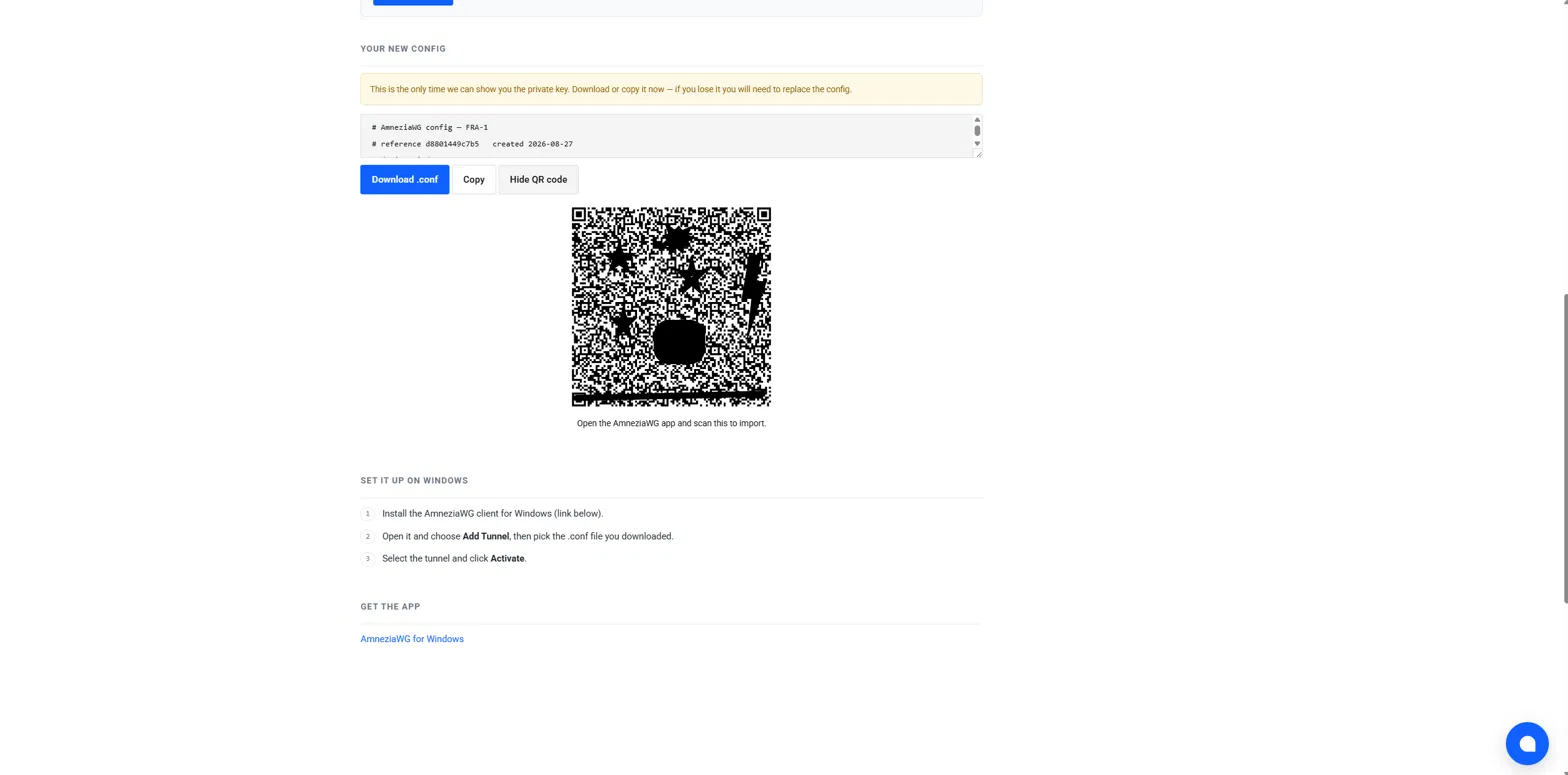
Your config appears below the form, and the QR code opens automatically for phones. Leave this page open on your computer.
STEP 4:
a) Open AmneziaWG on your phone and tap the + button.
b) Choose Scan from QR code and point the camera at the screen.
c) Give the tunnel a name if prompted and save it.
d) Toggle the tunnel on, then tap OK when Android asks to allow the VPN connection.
No QR code on screen? Tap Show QR code, or use Download .conf, transfer the file to your phone and choose Import from file instead.
STEP 5:
Confirm the tunnel is carrying your traffic.
a) Browse to https://torguard.net/whats-my-ip.php
b) The IP Address line should show a TorGuard IP and state "Protected".
Good to know
• The private key is shown once. If you lose it, use Replace in the client area to issue a new config for that slot.
• One config runs on one device at a time. Running the same config on two devices will make both drop in and out.
• If a location stops connecting where you are, its IP may be blocked locally. Use Replace and pick a different IP — the client area shows the exit IP of every server.
• Check status in the client area shows whether each config has connected recently, which is the quickest way to tell a blocked server from a misconfigured app.