
Warning: This method will delete and replace any existing openvpn configuration on pfsense. If you have old configurations and would like to keep it, then kindly use this guide instead
Step 1: Log in to your pfSense router.
Step 2: Decide which gateway you would like to connect to, and obtain its hostname. You can find a list of all of our hostnames available on our network page or if you use a Static IP then use this.
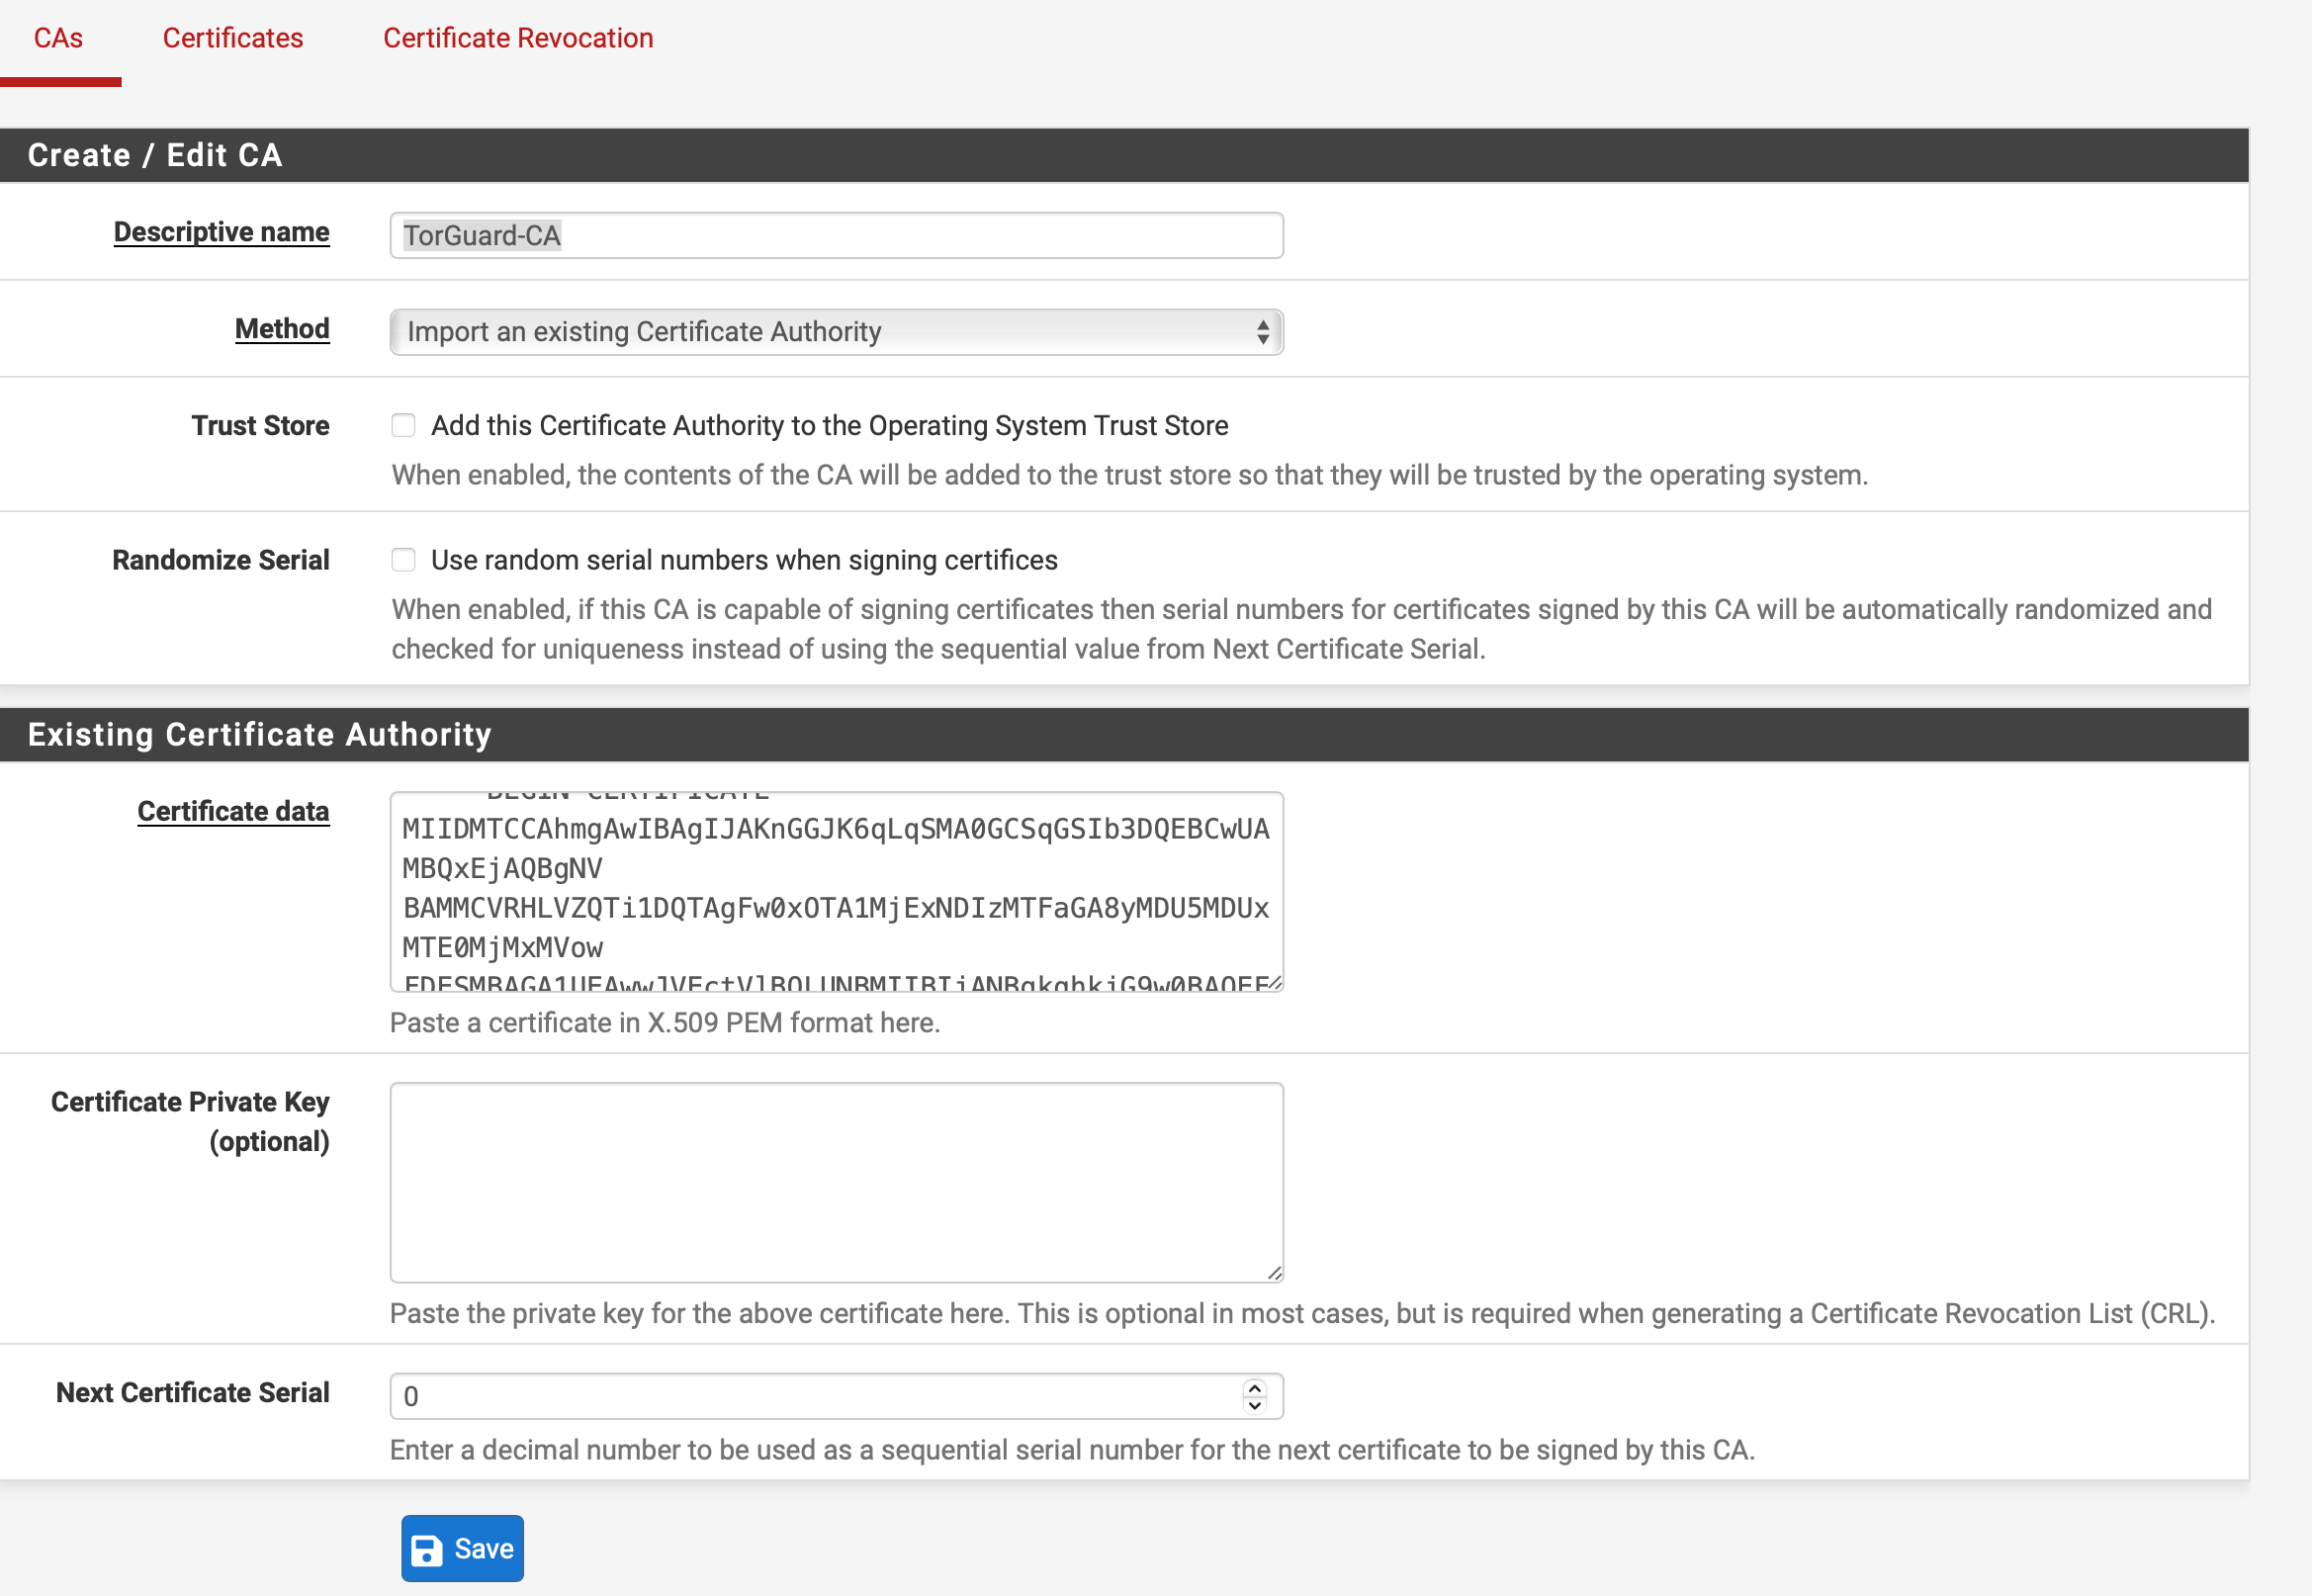
Step 3: Navigate to System>Cert Manager and select Add. Enter a name into the Descriptive name field, such as TorGuard-CA.
Set the Method as "Import an existing Certificate Authority".
Download the OpenVPN CA certificate from our certificate page here and open it in a text editor. Copy the entire contents of the file into the Certificate data field.
Then, press Save.
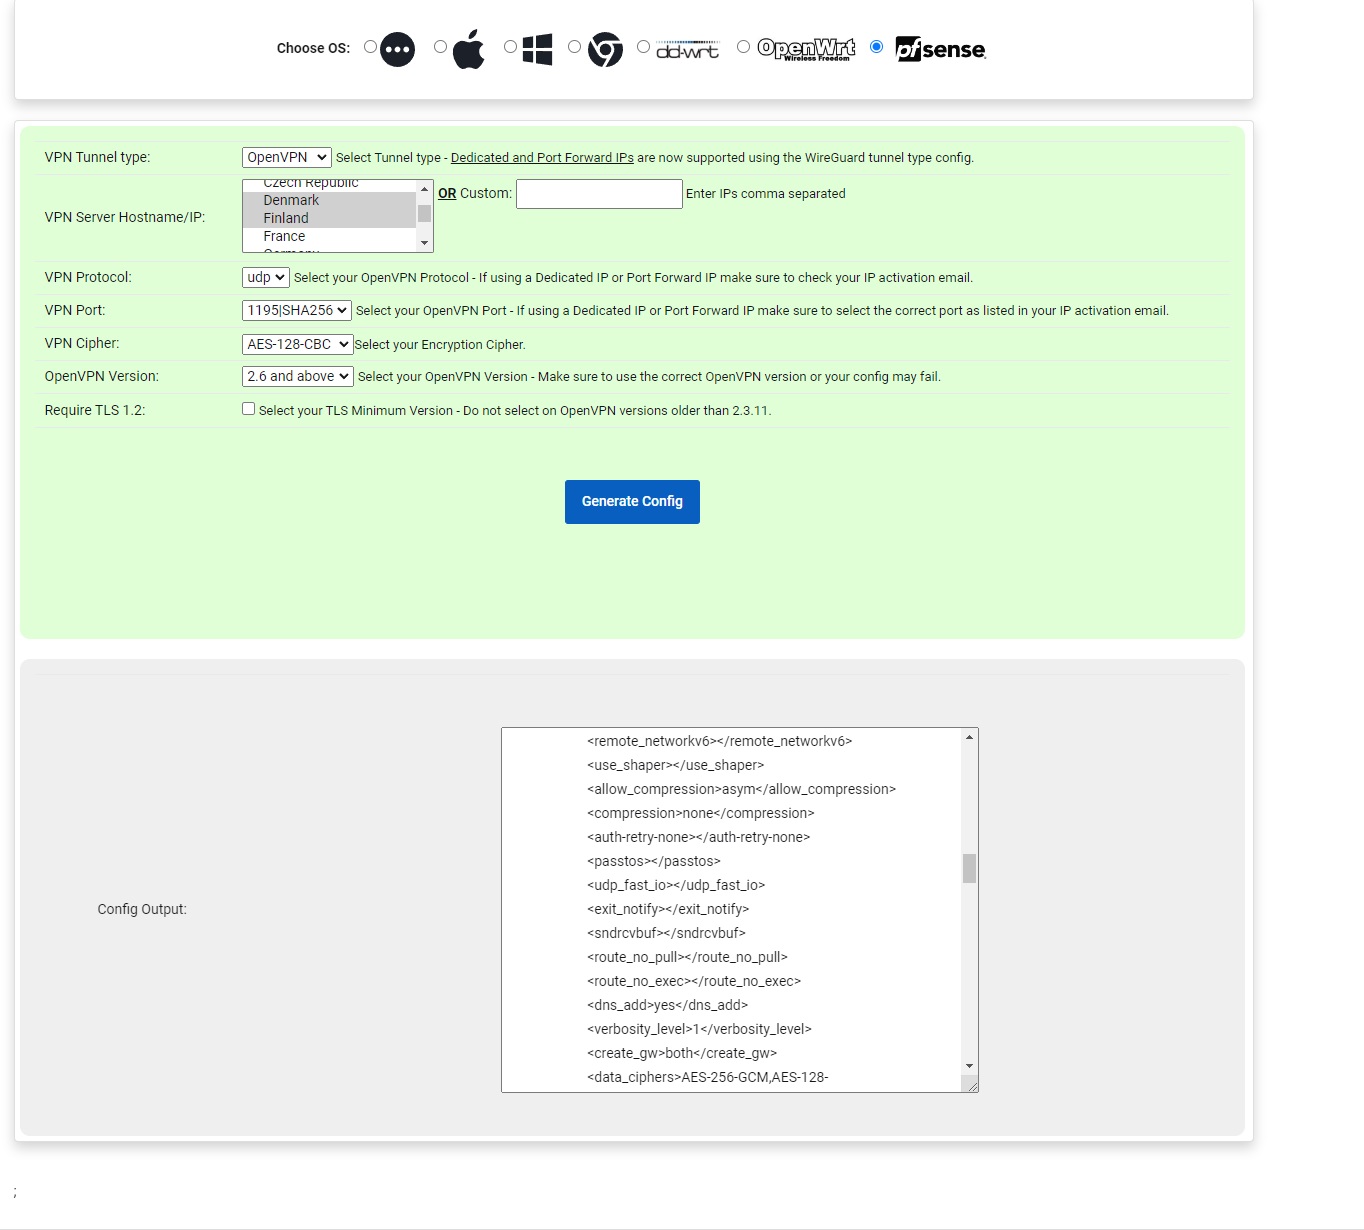
Step 4: Navigate to TorGuard website >Tools>Config Generator and select pfsense.
Select the Desired VPN server(s), and openvpn Config, then click Generate.
An XML file will be downloaded to your PC.
Note: You can select multiple servers by holding the CTRL button on your keyboard, and clicking on the servers.
Step 5:
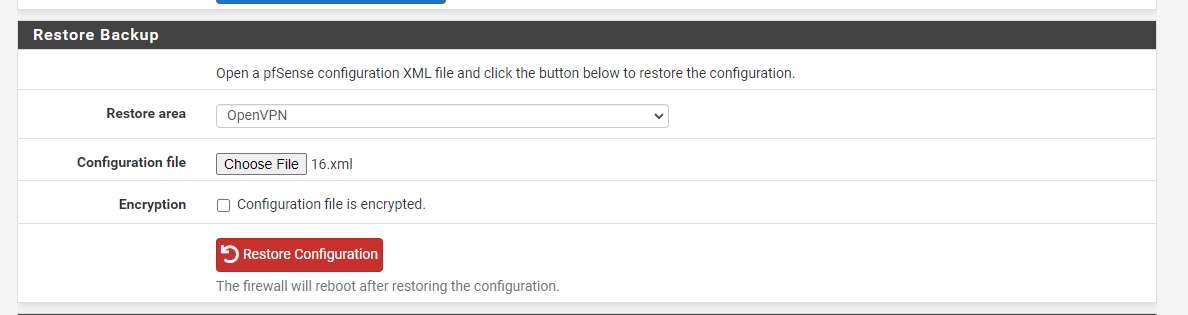
On Pfsense > browser to Diagnostics > Backup & Restore.
Select Restore Area: OpenVPN
Configuration File: Select the downloaded XML file
Click Restore Configuration.
Step 6:
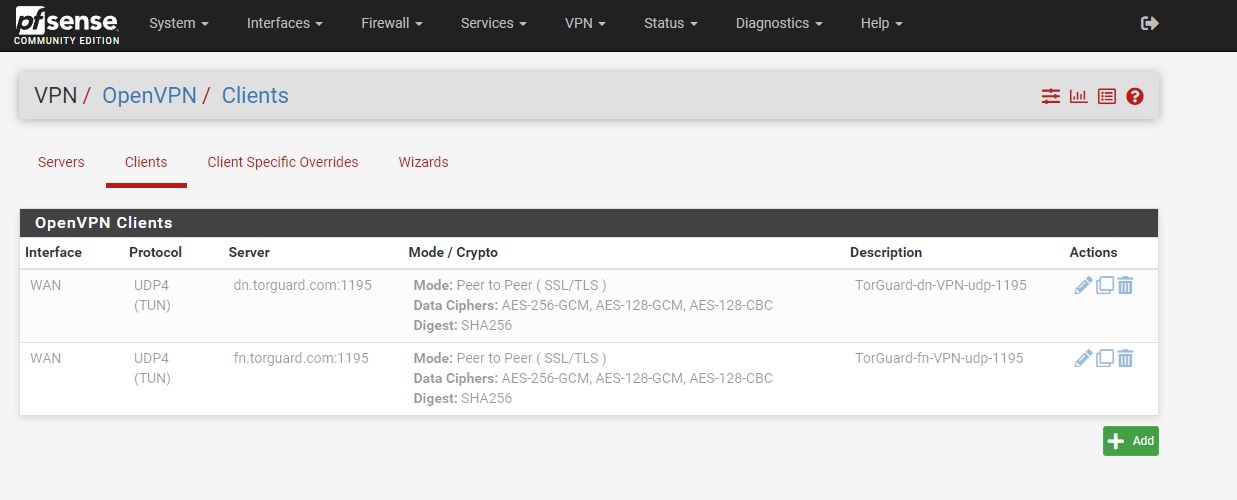
Imported configs are Disabled by default , and missing your vpn credentials. Head to Pfsense > VPN > Openvpn > Clients, and click the edit icon beside the openvpn config which you would like to activate.
Step 7:
- Uncheck "Disabled"
- Enter the following settings under "User Authentication Settings":
Username: Enter your TG VPN Username
Password: Enter your TG VPN Password
Authentication Retry: Leave Unchecked.
Click Save
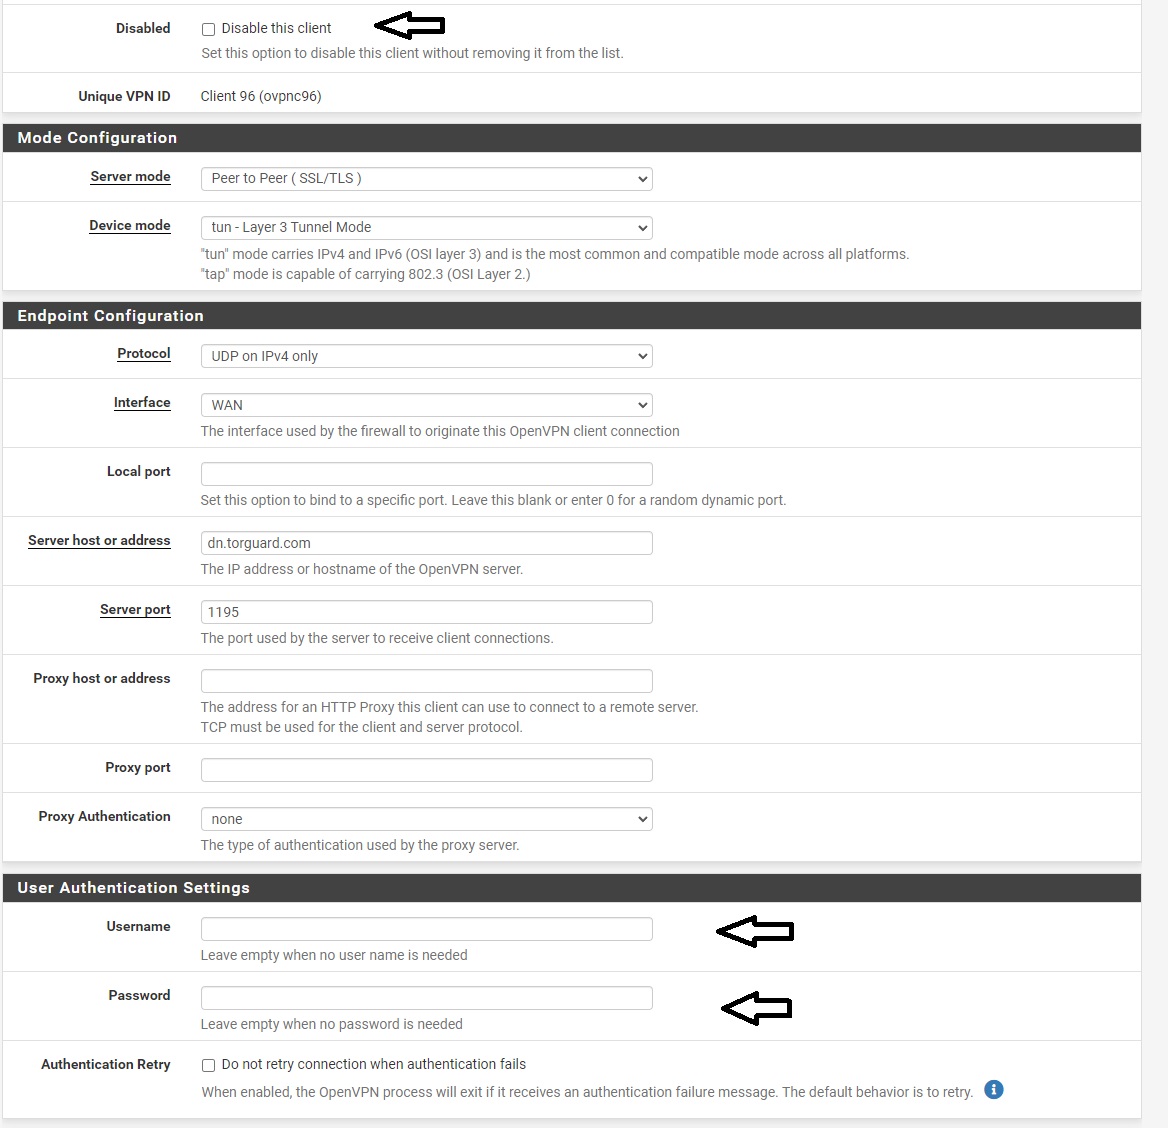
Step 8.
Navigate to Firewall>NAT>Outbound, and select Manual Outbound NAT rule generation and hit save. You should then see 4 rules.
Under the Actions heading, you should see an icon that looks like two pages, called Add a new mapping based on this one. Duplicate each of the 4 rules exactly, but change their interface to OpenVPN, clicking Save after each rule is duplicated. Now click Apply Changes.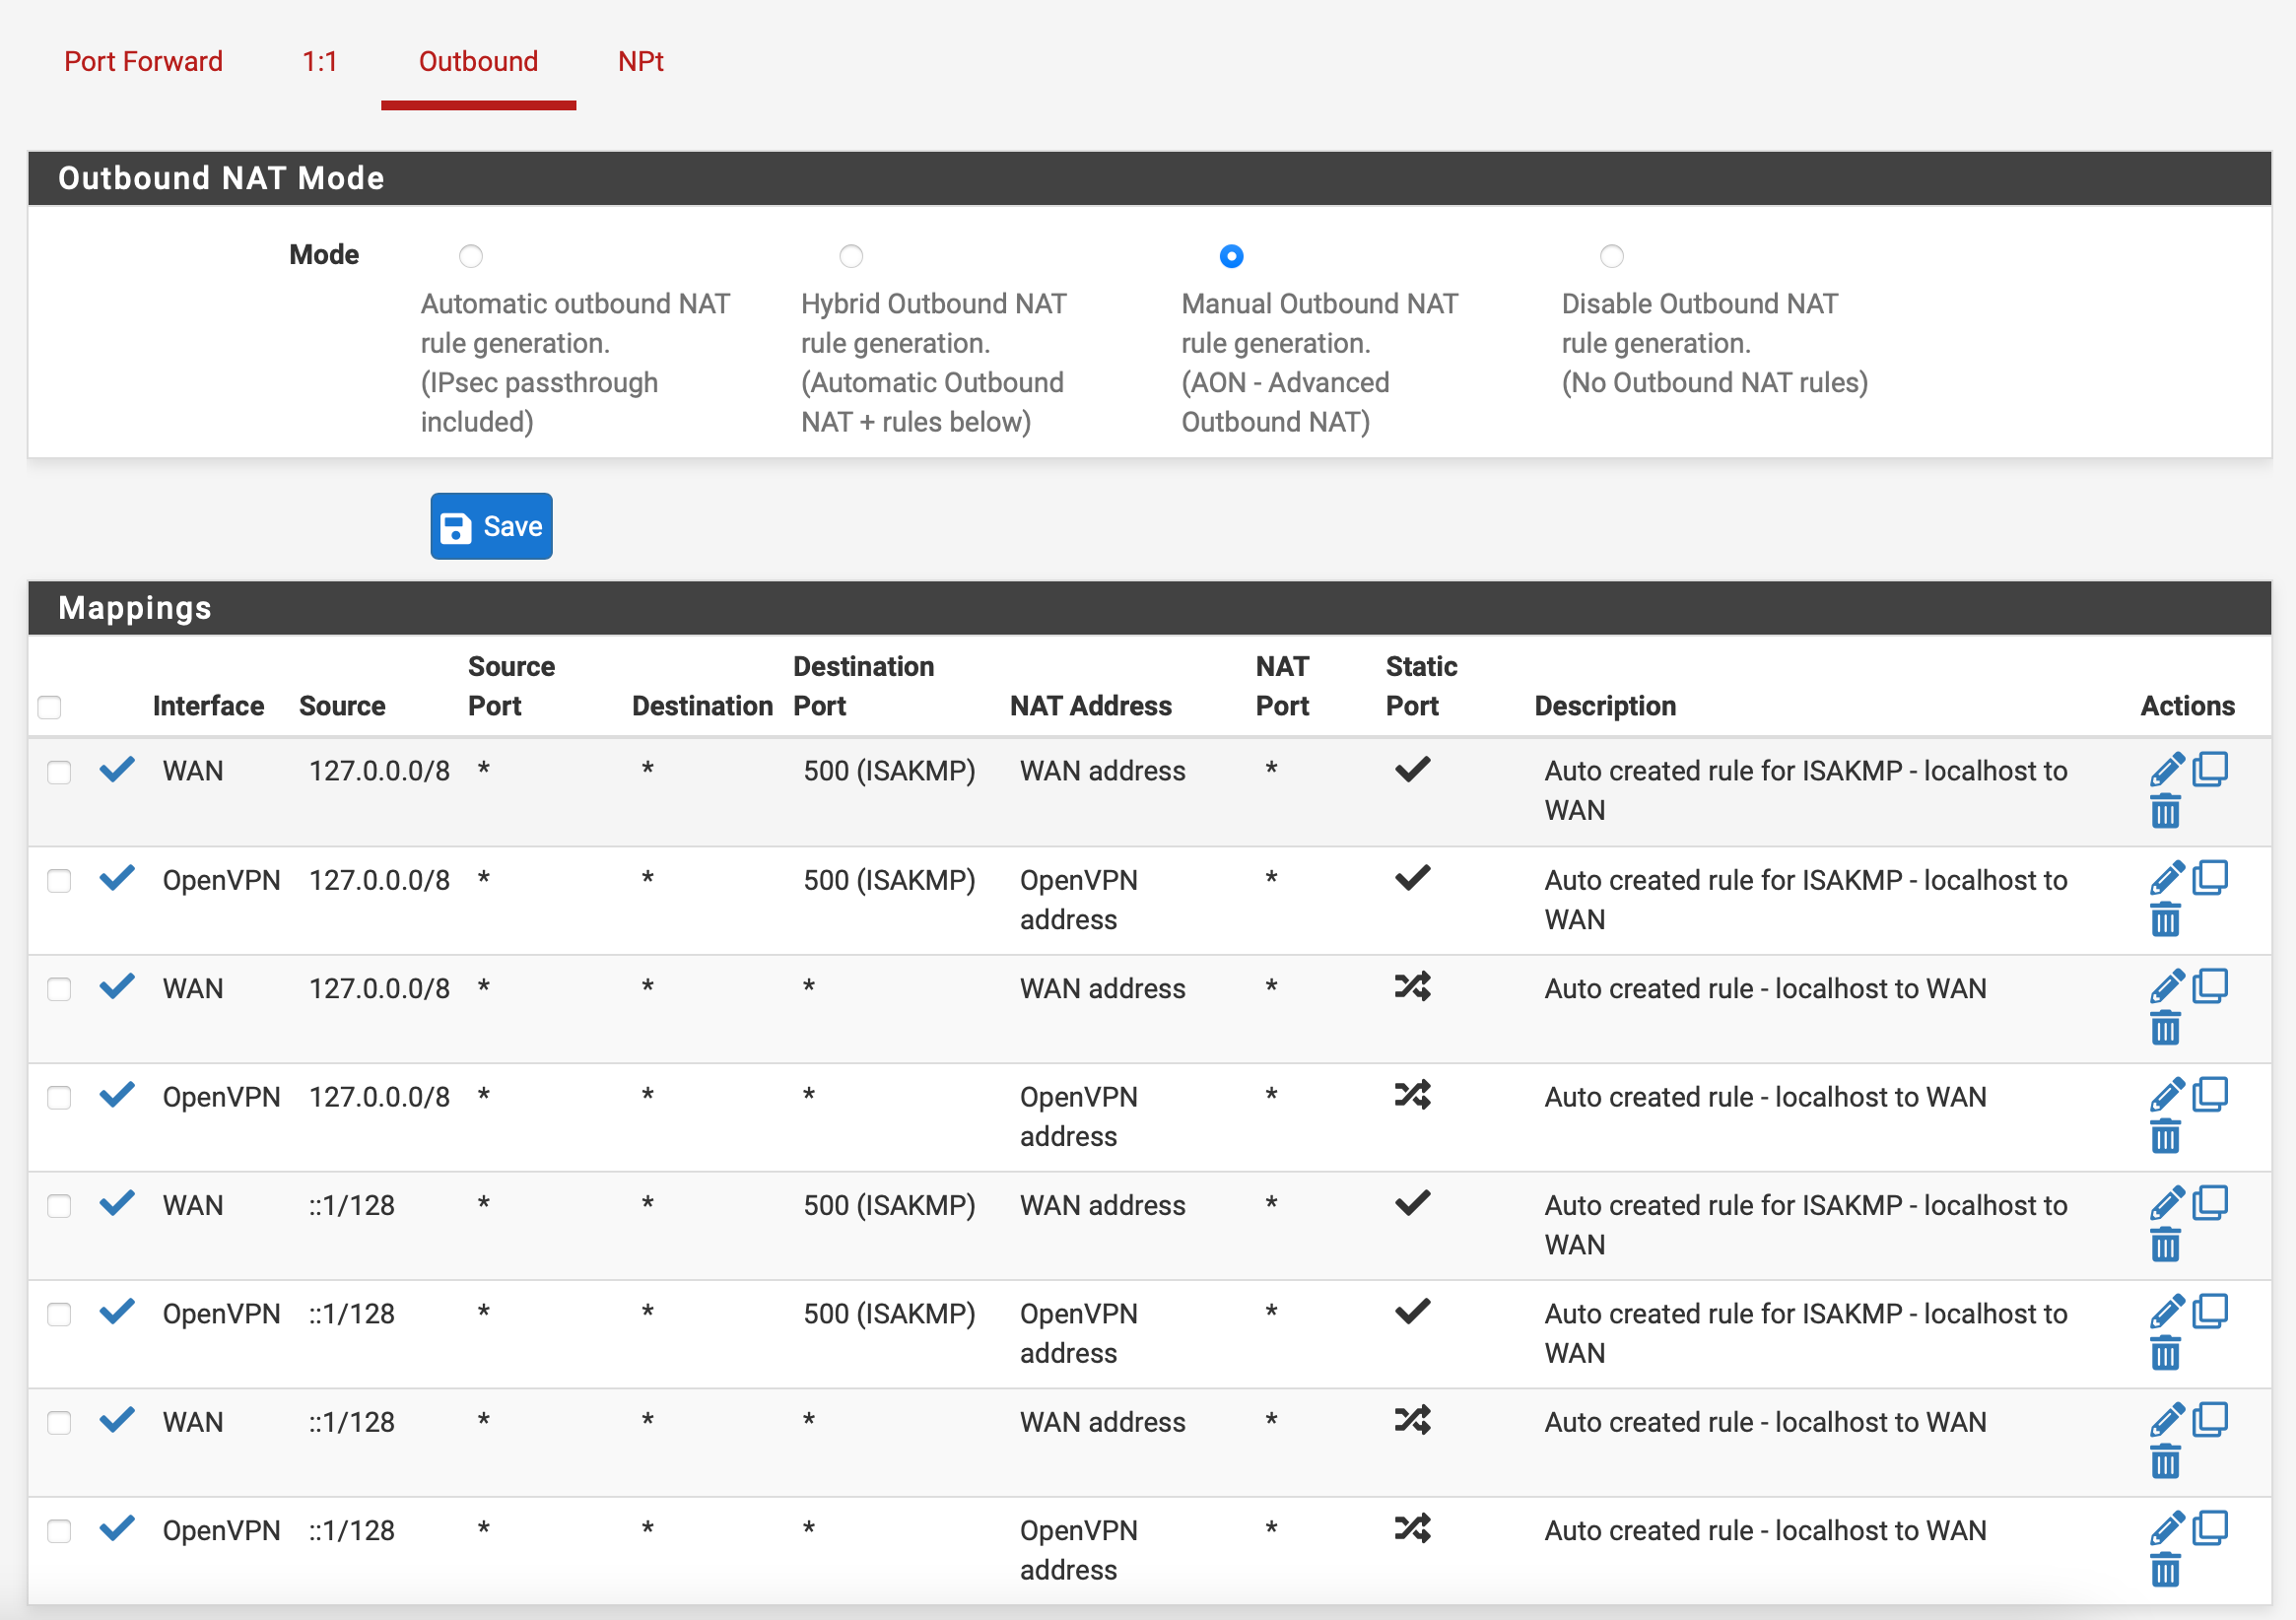
Step 9:
Navigate to System > General Setup and set DNS Servers to:
DNS Servers: 1.1.1.1
Add DNS Server: Click to add a secondary DNS and set to: 10.8.0.1
Step 10:

Verify your connection. Navigate to Status>OpenVPN and check to see whether your OpenVPN client is up.
Finally, visit What's My IP to verify that you are protected.